Drying your dog after a bath can be time-consuming and stressful for both you and your furry friend. Many pet owners struggle with wet dogs shaking water everywhere, taking hours to air dry, or becoming anxious during the drying process.
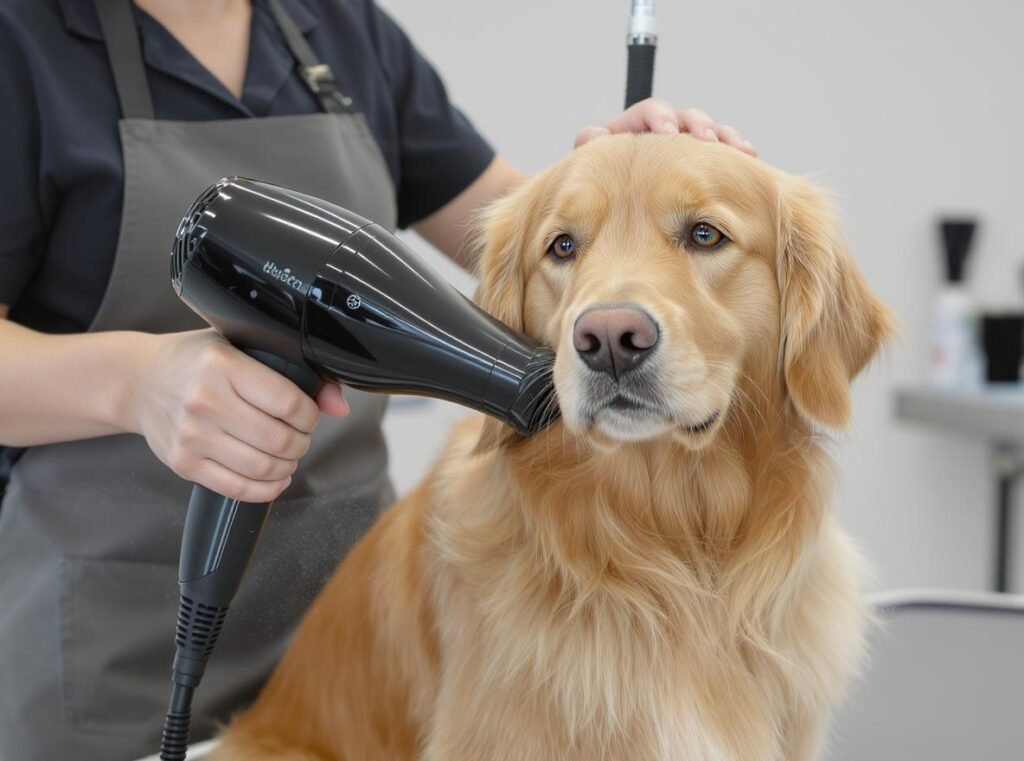
Using a dog dryer correctly involves towel drying first, starting from the rear and working toward the head, keeping the dryer moving constantly at least 6 inches from your dog’s skin, and using the lowest heat setting possible. Professional dog dryers are safer and more effective than household hair dryers for this purpose.
Read on to discover the step-by-step techniques, safety tips, and expert recommendations that will make drying your dog a breeze.
What Type of Dog Dryer Should You Use?
Understanding the different types of dog dryers is crucial for safe and effective grooming.
Professional dog dryers are specifically designed for pet grooming and are much safer than household hair dryers. High-velocity dryers are recommended for most home users and professionals due to their speed and effectiveness.

Types of Dog Dryers Available
Different dog dryer types serve various needs and budgets:
Forced air/high-velocity dryers are the most popular choice for professional groomers. These powerful units use no heat or low heat and are best for thick or double coats, heavy shedding, and professional grooming. They work by blowing air at high velocity to push water out of the coat rather than evaporating it.
Finishing dryers provide lower velocity with gentle heat, making them ideal for styling and finishing touches on show dogs or delicate coats. These dryers help achieve that perfect, fluffy appearance after the initial drying process.
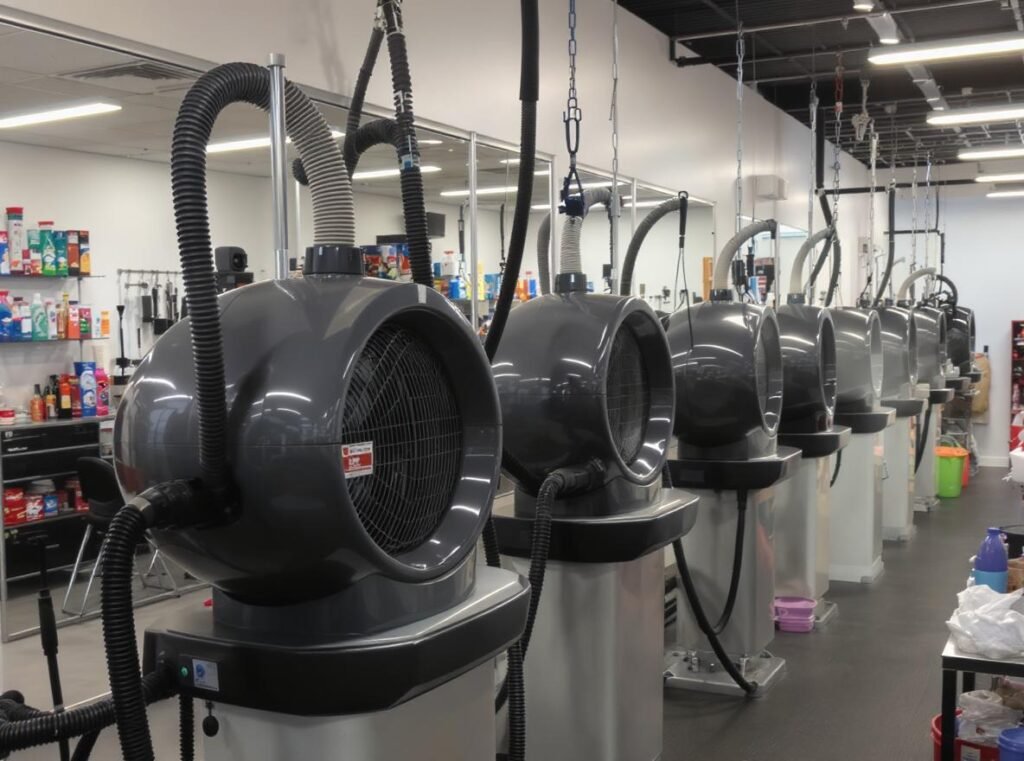
Cage dryers blow room-temperature air and are commonly used in salons for hands-free drying, especially when working with multiple dogs at once. They allow groomers to work on other tasks while dogs dry safely.
Handheld dryers are similar to human hair dryers but designed specifically for pets. They’re suitable for small dogs or touch-ups and offer portability for home use.
| Dryer Type | Description & Use Case | Heat Level |
|---|---|---|
| Forced Air/High Velocity | Powerful, no/low heat; best for thick coats, heavy shedding | None to low |
| Finishing Dryer | Lower velocity, gentle heat; ideal for styling and show dogs | Low to medium |
| Cage Dryer | Room-temperature air; hands-free salon drying | None |
| Handheld Dryer | Pet-specific design; suitable for small dogs and touch-ups | Variable |
How Do You Prepare Your Dog for Drying?
Proper preparation ensures a stress-free drying experience and significantly reduces overall drying time.
Before using a dryer, blot your dog with an absorbent towel to remove as much water as possible. Avoid vigorous rubbing, which can tangle fur or irritate the skin. Apply conditioner or detangler and gently comb through to prevent mats.

Essential Pre-Drying Steps
Follow these critical preparation steps for optimal results:
Towel blotting technique is crucial for effective drying. Use a high-absorbency towel and squeeze (not rub) the fur to remove excess water. This step alone can reduce drying time by up to 50%.
Detangling preparation prevents painful mat formation during the drying process. Apply conditioner or detangler and gently comb through the coat, paying special attention to areas prone to matting like behind the ears, under the legs, and around the tail.
Create a calm environment by placing your dog on a non-slip surface in a quiet area to minimize stress. The right environment helps reduce anxiety and makes the entire process more manageable.
- Gather all necessary tools before starting: towels, brushes, and the dryer
- Ensure room temperature is comfortable (around 70-75°F)
- Have high-value treats ready for positive reinforcement
- Check that your dryer is clean and all attachments are secure
What Are the Correct Temperature and Speed Settings?
Using appropriate settings prevents skin damage and ensures comfortable, effective drying.
Use the lowest heat setting possible—preferably just above room temperature (around 85°F–135°F). Start with low airflow for sensitive areas or anxious dogs, increasing speed as tolerated. High speed is best for thick coats and faster drying.

Professional Temperature Guidelines
Understanding proper temperature control is essential for safe grooming:
Cool air setting remains the safest option for nervous dogs or those with sensitive skin. While it takes longer, it eliminates the risk of burns and thermal damage.
Low heat setting (85°F–135°F) works well for most dogs and significantly reduces drying time. Always test the temperature on your hand first—if it feels too hot for your skin, it’s too hot for your dog.
Avoid high heat settings completely unless you’re an experienced professional groomer. High heat can cause burns, dry out the coat, and create significant discomfort for your pet.
Speed Control Strategy
Adjust airflow speed based on your dog’s comfort level and coat type:
- Low speed: Ideal for face, ears, and sensitive areas
- Medium speed: Perfect for body drying and nervous dogs
- High speed: Best for thick coats and professional grooming
| Setting | Temperature Range | Speed Level | Best For |
|---|---|---|---|
| Cool | Room temperature | Low-Medium | Sensitive dogs, beginners |
| Low heat | 85°F-135°F | Medium-High | Most dogs, regular grooming |
| Warm | Above 135°F | High | Experienced users only |
How Should You Position and Move the Dryer?
Proper dryer positioning and movement prevent injury and ensure even, efficient drying.
Hold the nozzle at least 6 inches from your dog’s skin to prevent burns and discomfort. Keep the dryer perpendicular to the coat for maximum effectiveness and move slowly in a back-and-forth or gentle circular motion.

Professional Positioning Techniques
Follow these expert positioning guidelines for optimal results:
Maintain safe distance at all times. The 6-inch rule is non-negotiable—closer distances risk burns and can cause significant discomfort, even with cool settings.
Use proper angles for maximum efficiency. Keep the dryer perpendicular to the coat surface to lift the undercoat and promote faster drying. This technique also helps remove loose fur effectively.
Master the movement pattern by moving slowly and steadily. Avoid rapid or erratic motions, as these increase drying time and can cause anxiety. Never stay in one spot for more than a few seconds, especially when using any heat setting.
Systematic Drying Approach
Professional groomers recommend this methodical approach:
Start at the rear and work toward the head. This technique helps acclimate the dog to the noise and sensation, especially important for anxious pets.
Dry in sections by focusing on one area at a time until completely dry before moving to the next. For longer coats, use a brush to help separate the hair as you dry.
Handle sensitive areas carefully by using lower settings for the face, ears, and belly. Pinch ears shut when drying to protect them from air blasts.
- Work systematically from rear to front
- Focus on water-collecting areas like legs and belly
- Never blow air directly into the dog’s face or ears
- Use your free hand to separate and fluff the fur
How Do You Introduce an Anxious Dog to the Dryer?
Many dogs fear the noise and sensation of dryers, requiring patient, gradual introduction using positive reinforcement.
Start by turning on the dryer away from your dog to let them get used to the noise. Pair dryer sessions with treats and praise to build positive associations, beginning with short sessions on the lowest setting.

Systematic Desensitization Process
Professional dog trainers recommend this proven approach:
Phase 1: Visual Introduction – Let your dog see and investigate the dryer while it’s turned off. Allow them to sniff and explore the equipment while rewarding calm behavior with treats and praise.
Phase 2: Sound Desensitization – Turn the dryer on at the lowest setting while your dog is across the room. Gradually decrease the distance over multiple sessions, always maintaining positive associations through treats and calm reassurance.
Phase 3: Physical Introduction – Once your dog is comfortable with the sound, introduce the sensation of air on their coat. Start with brief touches of air on less sensitive areas like the back or sides.
Phase 4: Full Drying Sessions – Begin actual drying with short duration sessions, gradually increasing time and intensity as your dog becomes more comfortable.
Building Positive Associations
Create lasting comfort through these techniques:
Reward-based training works most effectively. Offer high-value treats, praise, and gentle touch throughout the process to create positive associations with the dryer.
Gradual exposure prevents overwhelming your dog. Rush the process and you may create lasting fear that’s difficult to overcome.
Comfort and reassurance through calm words and gentle touch help dogs feel secure during the process.
| Week | Activity | Duration | Goal |
|---|---|---|---|
| 1 | Visual exposure (dryer off) | 5-10 minutes | Familiarity and comfort |
| 2 | Sound introduction (low setting) | 2-5 minutes | Noise tolerance |
| 3 | Air sensation (brief contact) | 30 seconds-2 minutes | Physical acceptance |
| 4 | Short drying sessions | 5-15 minutes | Complete comfort |
What Are Common Mistakes to Avoid?
Understanding and avoiding these frequent errors ensures safe, effective drying and prevents injury or trauma.
The most critical mistakes include using human hair dryers, not adjusting heat settings properly, holding the dryer too close to the skin, and staying in one spot too long. These errors can cause burns, skin irritation, or lasting anxiety about grooming.

Critical Safety Mistakes
Avoid these dangerous practices that can seriously harm your dog:
Using human hair dryers is the most common and dangerous mistake. These devices can overheat and burn a dog’s sensitive skin, as they’re not designed for pet use and lack appropriate safety features.
Incorrect heat settings cause many injuries. Failing to use low or no heat can cause discomfort, burns, or skin damage. Always err on the side of caution with temperature.
Inadequate distance control leads to burns and discomfort. Holding the dryer too close to the skin concentrates heat and air pressure, potentially causing injury.
Stationary drying creates hot spots and overheating. Staying in one spot, even for a few seconds, can cause skin damage and significant discomfort.
Process and Maintenance Errors
These mistakes reduce effectiveness and can damage equipment:
Skipping towel drying significantly increases drying time and stress levels. Not removing excess water beforehand makes the entire process longer and more stressful for your dog.
Ignoring regular maintenance reduces dryer efficiency and can damage the equipment. Dirty filters and clogged hoses prevent proper airflow and can cause overheating.
Poor preparation leads to tangles, mats, and extended drying times. Failing to detangle before drying can create painful situations for your pet.
- Never leave your dog unattended with a dryer running
- Don’t force a terrified dog through the process
- Avoid using maximum settings without proper experience
- Never ignore signs of overheating or distress
How Do You Maintain Your Dog Dryer?
Regular maintenance ensures optimal performance, longevity, and safety for both you and your pets.
Clean filters daily by vacuuming and wash them weekly with warm, soapy water. Regularly remove hair from the housing and nozzles, disinfect after each use, and check all connections before operation.

Daily Maintenance Routine
Establish these habits for optimal dryer performance:
Filter cleaning is the most critical daily task. Vacuum filters after each use to remove fur, dust, and debris. Clogged filters reduce airflow efficiency and can cause motor strain.
Hair removal from housing and nozzles prevents blockages that can damage the motor. Check and clear all air passages after each grooming session.
Equipment inspection should include checking hoses, nozzles, and electrical connections for any signs of wear or damage.
Weekly and Monthly Tasks
Deeper maintenance ensures long-term reliability:
Weekly deep cleaning involves washing filters with warm, soapy water and allowing them to dry completely before reinstalling.
Monthly safety checks should include thorough inspection of electrical cords, testing safety features, and verifying all attachments are secure.
Disinfection protocol is essential for professional settings. Wipe down the dryer and all attachments after each use with appropriate disinfectants.
Professional Service Schedule
For commercial use, follow this service timeline:
- Quarterly: Professional inspection and tune-up
- Annually: Complete motor service and safety certification
- As needed: Immediate repair of any damaged components
| Maintenance Task | Frequency | Importance |
|---|---|---|
| Filter vacuuming | Daily | Critical |
| Hair removal | After each use | High |
| Filter washing | Weekly | High |
| Safety inspection | Monthly | Critical |
| Professional service | Annually | Medium |
Which Dog Dryer Should You Choose for Your Business?
For professional groomers and pet businesses, selecting the right equipment directly impacts service quality and operational efficiency.
High-velocity dryers are best for professional salons due to their power, speed, and versatility. Choose models with variable speed and temperature settings, durable construction, and multiple attachments for different coat types and dog sensitivities.
Professional-Grade Features
When selecting equipment for your grooming business, prioritize these essential features:
Variable speed and temperature controls allow customization for different coat types, dog sensitivities, and grooming requirements. This flexibility is crucial for handling diverse clientele.
Durable construction ensures long-term reliability in commercial settings. Look for metal or heavy-duty plastic construction that can withstand daily professional use.
Noise reduction technology benefits both dogs and groomers. Quieter models reduce stress for anxious pets and create a more pleasant working environment.
Safety features like automatic shut-off and thermal protection are essential for long grooming sessions and prevent accidents in busy salon environments.
Business Considerations
Consider these factors when making your investment:
Multiple attachments including various nozzles for different drying needs improve efficiency and service quality. Different coat types require different approaches.
Power and performance should match your business volume. High-velocity dryers handle heavy-duty commercial use better than consumer models.
Warranty and service support protect your investment and ensure minimal downtime.
If you’re looking to expand your grooming business or upgrade your equipment, consider professional-grade options that offer both performance and reliability. The Conason P1C high-speed hair dryer provides excellent results for professional grooming applications with its negative ionic technology, adjustable settings, and durable construction designed for commercial use.
For wholesale pricing and bulk orders perfect for distributors and retailers, visit our complete product collection at https://conason.com/product/ or contact us directly for customized quotes and distributor inquiries.
Summary
Using a dog dryer correctly involves towel drying first, starting from the rear, maintaining at least 6 inches distance, and using low heat settings. Professional dog dryers are safer than household alternatives and provide superior results. Remember to introduce anxious dogs gradually, keep the dryer moving constantly, and maintain your equipment regularly for optimal performance.

Ready to upgrade your grooming equipment with professional-grade dryers? Browse our complete collection and send us an inquiry for wholesale pricing tailored to your business needs.